Going solar involves a lot more than just mounting panels on your roof. Between getting quotes, pulling permits, passing inspections, and getting your utility to flip a switch, the average homeowner waits 4–12 weeks from contract signing to system activation. Knowing what to expect at each stage makes the process far less stressful.
This guide walks you through all 8 steps of a residential solar installation, with realistic timelines, red flags to watch for, and the questions every homeowner should ask before signing anything.
The Full Timeline at a Glance
| Stage | Who Does It | Typical Duration |
|---|---|---|
| 1. Get quotes | You + installers | 1–2 weeks |
| 2. Site assessment | Installer | 1–2 hours |
| 3. Permit filing | Installer | 2–8 weeks |
| 4. Utility interconnection | Installer + utility | 2–8 weeks (can overlap) |
| 5. Installation day | Install crew | 1–3 days |
| 6. City/county inspection | Inspector | 3–10 days after install |
| 7. Utility meter upgrade | Utility company | 1–4 weeks |
| 8. Monitoring setup | You + installer | 1 hour |
Step 1: Get Multiple Quotes
Start with at least 3 quotes from different installers. Never sign with the first company that knocks on your door or calls you — high-pressure solar sales is a genuine industry problem, and the first quote is rarely the best price.
Where to Find Installers
- EnergySage: The most popular online marketplace. Installers compete for your business, which often results in lower pricing. You can compare side-by-side.
- SEIA member directory: Solar Energy Industries Association maintains a list of vetted members.
- Local referrals: Ask neighbors who have recently installed solar — firsthand experience with an installer is worth a lot.
- Direct installer websites: Large national companies (Sunrun, SunPower, Tesla Energy) have their own channels; compare these against local installer quotes.
What Every Quote Must Include
- Panel brand, model, and exact wattage
- Inverter brand and type (string, micro, or power optimizer)
- Total system size in kW and estimated annual production in kWh
- Price per watt (allows apples-to-apples comparison)
- Whether permits are included
- Equipment warranties and workmanship warranty
- Projected payback period and year-one savings estimate
Step 2: Site Assessment
After you choose an installer and sign a contract, they will schedule a site assessment. A qualified technician or engineer visits your home to:
- Inspect your roof condition, age, and orientation
- Measure available roof space and identify obstructions
- Evaluate your electrical panel — if it's an older 100-amp panel, it may need upgrading to 200 amps (typically $1,500–$3,000 extra)
- Note shading from trees, chimneys, and neighboring structures
- Confirm internet connectivity for monitoring equipment
If they find the roof needs repair, do the repair first — reroofing after solar is installed is expensive and complicated. Most installers won't proceed on a roof with less than 10 years of remaining useful life.
Step 3: Permits and System Design
After the site assessment, your installer creates a detailed system design and submits permit applications to your local building department and, separately, to your utility for interconnection approval.
You don't need to do anything during this phase — just be responsive if your installer needs your signature on documents or additional information. The interconnection application tells your utility you'll be adding a solar system and requesting a bi-directional meter for net metering.
Step 4: Utility Interconnection Approval
Your utility reviews the system design and approves (or requests modifications to) the interconnection. This is separate from the local building permit. The utility needs to confirm:
- The system size won't overload the local grid segment
- The inverter meets IEEE 1547 anti-islanding safety standards
- Your meter can be upgraded to a bi-directional net metering meter
Most utilities approve residential systems within 2–6 weeks. Some rural cooperatives and municipal utilities are slower. Your installer handles all of this — you just need to be patient.
Step 5: Installation Day
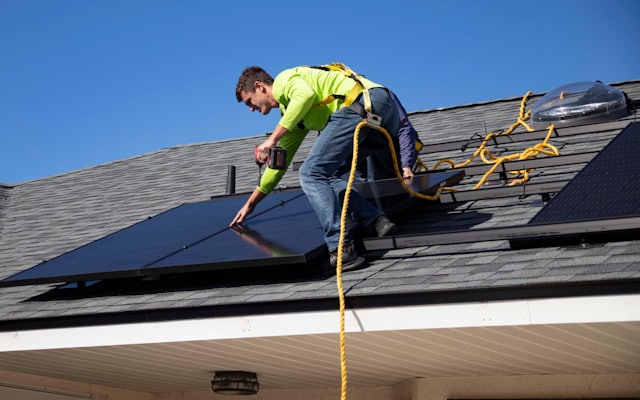
This is the exciting part. A crew of 2–6 technicians arrives early in the morning. Here's what happens:
Morning (Hours 1–3): Roof Work
- Crew marks panel positions and locates roof rafters using stud finders
- Lag bolts are drilled into rafters and flashed (sealed) to prevent leaks
- Aluminum racking rails are mounted on the lag bolts
Midday (Hours 3–6): Panel Mounting
- Panels are hoisted to the roof and clipped onto racking rails
- DC wiring is run between panels in series (or per-panel for microinverters)
- Conduit is routed from roof to the electrical service panel
Afternoon (Hours 6–8): Electrical Connections
- Inverter is mounted (usually in garage or utility room)
- AC disconnect and production meter are installed
- System is wired into your main electrical panel
- Monitoring gateway is connected to internet router
At the end of installation day, the crew will do a basic system check — but they cannot fully power it on until the city inspection and utility approval are complete. The system sits ready but inactive.
Step 6: City/County Inspection
A municipal building inspector visits to verify the installation meets local electrical and structural codes. The inspector checks:
- Racking attachment and flashing
- Electrical conduit routing and connections
- Proper labeling of disconnect switches (required by NEC 690)
- Ground fault protection and arc-fault protection devices
Most installations pass first inspection. If there are corrections needed, your installer schedules a re-inspection. Once the inspection is passed, you receive a Permission to Operate (PTO) from the city — this is separate from the utility PTO.
Step 7: Utility Meter Upgrade and Final PTO
After city inspection passes, your installer submits the approval to the utility. A utility technician visits (you usually don't need to be home) to swap your standard meter for a bi-directional net metering meter. The utility then issues the final Permission to Operate (PTO).
This step takes anywhere from 1 to 4 weeks depending on your utility's schedule. Once you receive the utility PTO, you're clear to turn the system on.
Step 8: System Activation and Monitoring Setup
Your installer will either be present or walk you through remotely activating the system — usually just flipping a few switches in sequence. Within hours, you'll see production data in the monitoring app.
Monitoring Apps by Inverter Brand
- Enphase Enlighten: Panel-level monitoring, available for iOS and Android
- SolarEdge App: Panel-level monitoring via power optimizers
- SMA Sunny Portal: String inverter monitoring
- Tesla App: Integrated solar + Powerwall monitoring
Check your monitoring app during the first sunny day to confirm production looks reasonable. A 7 kW system on a sunny day should produce 35–45 kWh (5–6.5 hours × 7 kW).
How to Choose the Right Solar Installer
The installer matters as much as the equipment. Here's what to verify before signing:
Certifications to Look For
- NABCEP (North American Board of Certified Energy Practitioners) — the gold standard
- State contractor's license for electrical work
- General liability insurance ($1M minimum)
- Workers' compensation insurance
Questions to Ask
- "How long have you been in business in this state?"
- "Can I see 3 recent customer references?"
- "Do you use subcontractors for installation?"
- "What's your workmanship warranty?" (10 years minimum)
- "What happens if your company closes during my 25-year panel warranty?"
Ground-Mounted vs Rooftop: Choosing Your Mounting Type
Rooftop Solar: The Default Choice
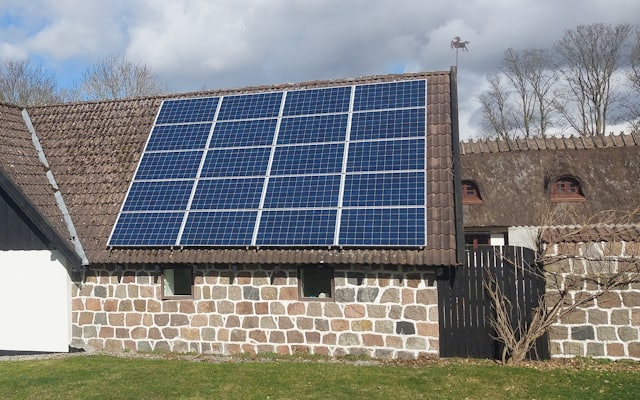
Approximately 90% of residential solar installations in the US are rooftop. The reasons are practical: most homes have adequate roof space, mounting on existing structure costs less than building a new one, and rooftop installations have a decades-long track record.
- Lower cost by $0.20–0.50/W vs. ground mount — saves $1,600–4,000 on 8kW system
- No land footprint — panels use existing roof structure
- HOAs often more comfortable with roof vs. yard panels
- Aesthetics preferred by many homeowners and buyers
- Simpler permitting (usually only electrical permit required)
- Less vulnerable to ground-level physical damage
- Limited by roof orientation, pitch, and condition
- Roof shading from trees, chimneys, or dormers reduces output
- Panels must be removed for roof replacement (adds $1,500–3,000)
- Harder access for cleaning and maintenance
- Cannot expand beyond roof capacity
- Roofs over 15 years old may need replacement before installation
Rooftop Solar Cost (8kW System, 2026)
Ground-Mounted Solar: The Premium Option
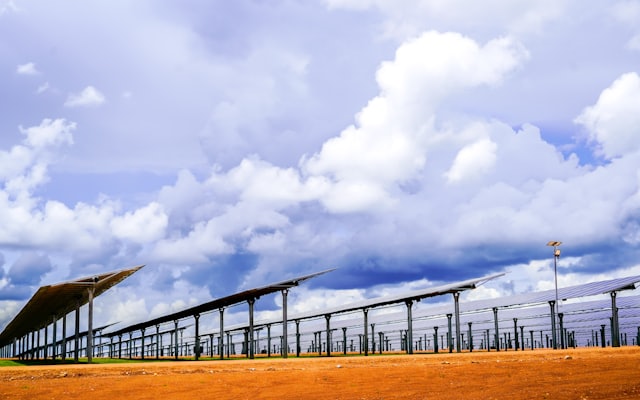
Ground-mounted solar systems are installed on racking structures anchored directly into the ground — typically via driven steel posts, helical piers, or concrete piers. The racking can be fixed at any angle or, with tracking hardware, can follow the sun across the sky.
- Optimal south-facing tilt (set to your latitude for maximum output)
- Easy access for cleaning — remove snow, bird droppings efficiently
- Works with any roof condition — even a 50-year-old roof
- Expandable — add more rows as budget allows
- Compatible with single-axis or dual-axis tracking for maximum output
- Better air circulation under panels = cooler operating temp = slightly better efficiency
- Costs $0.20–0.50/W more than rooftop equivalent
- Requires 200–400 sq ft of usable yard for a modest system
- HOAs often more restrictive about visible yard installations
- Requires separate building permit plus electrical permit
- Possible zoning review and setback variance requirements
- More exposure to ground-level damage, vandalism, and wildlife
Ground-Mount Cost Comparison (8kW System, 2026)
Ground-Mount Types: Fixed vs. Tracking
Ground-mounted solar gives you three options for how panels are oriented, with dramatically different cost and production profiles:
Fixed Tilt Ground Mount
Panels are set at a fixed angle (typically latitude ± 5–10°) facing due south. Once installed, angle never changes.
- Cost premium over rooftop: +$0.20–0.30/W
- Production vs. rooftop: +5–10% (due to optimal angle)
- Maintenance: Minimal — static structure
- Best for: Most residential installations; straightforward economics
Single-Axis Tracking
Panels rotate on a single east-west axis, following the sun from morning to afternoon. Motor and controller required.
- Cost premium over fixed rooftop: +$0.50–0.80/W
- Extra cost for 8 panels: +$4,000–6,400
- Production boost: +15–25% vs. fixed rooftop
- Best for: Large systems (15kW+), time-of-use rate optimization, areas with long summer mornings
Dual-axis tracking rotates panels both east-west (daily) and north-south (seasonally), theoretically maximizing output year-round. In practice, the additional production gain over single-axis (5–10%) rarely justifies the $1,000+/panel additional cost, higher maintenance requirements, and more complex mechanical systems. Dual-axis tracking is primarily used in utility-scale and research applications. For residential ground mounts, fixed tilt or single-axis are the right choices.
Bifacial Panels: The Ground-Mount Advantage
Bifacial solar panels have transparent backsheets and capture sunlight from both the front (direct sunlight) and the back (reflected ground albedo). They produce 10–20% more electricity than standard monofacial panels in ground-mount applications where light can reflect off the ground beneath them.
On a rooftop, bifacial panels offer minimal benefit (less than 2% gain) because the roof surface doesn't reflect light at a useful angle. But ground-mounted bifacial panels elevated 18–36 inches off light-colored ground (gravel, concrete, light soil) can consistently produce 12–18% more electricity per panel.
Popular bifacial models in 2026:
- REC Alpha Pure 440W bifacial: ~$0.42/W panel cost, excellent efficiency
- Jinko Tiger Neo 440W bifacial: ~$0.38/W panel cost, widely available
- Canadian Solar HiHero 445W bifacial: ~$0.40/W, N-type cells with low degradation
When to Choose Ground-Mounted Solar
These specific situations consistently favor ground-mounted over rooftop:
Roof Condition Issues
If your roof has less than 10 years of remaining life, installers will strongly recommend re-roofing before solar installation. Removing and reinstalling panels during a roof replacement costs $1,500–3,000. If your roof needs replacement soon anyway, a ground-mount avoids this problem entirely — your old roof can serve out its life while solar generates power from the yard.
Shade Problems
Trees, chimneys, dormers, and neighboring buildings can shade significant portions of a roof. Shading is the #1 cause of solar underperformance. If your south-facing roof is shaded between 10am and 2pm (solar peak hours), a ground-mount in an unshaded yard can produce 30–50% more electricity than a rooftop system on the same property.
North-Facing or Flat Roof
A north-facing primary roof produces 30–45% less electricity than a south-facing equivalent in the US. While racking can tilt panels at a better angle on a flat roof, structural loading limits apply. If your best roof surface faces north or east, a south-facing ground mount may be the more productive option.
Larger System Than Roof Allows
If you have an EV and want to cover home + EV charging, you may need 12–16 kW of solar. Many suburban roofs can only accommodate 8–10 kW. A ground array in the backyard supplements the rooftop system — some homeowners install a split system (rooftop + ground) to maximize total capacity.
Permitting for Ground-Mounted Solar
Ground-mounted solar requires more permitting than rooftop in most jurisdictions:
- Electrical permit: Same as rooftop solar. Covers the PV system, inverter, and grid connection. Required everywhere.
- Building/structural permit: Required in most jurisdictions for ground-mount foundations. The AHJ (Authority Having Jurisdiction) will review your post embedment depth, structural load calculations, and setbacks from property lines and structures.
- Zoning review: In some municipalities, ground-mounted solar requires a zoning variance, particularly for systems taller than 6 feet or within setback zones. Check with your local planning/zoning office before committing to a ground-mount design.
- HOA approval: Many HOAs are more restrictive about ground-mounted systems than rooftop, as ground arrays may be more visible from the street or neighboring properties. Even in solar-access-law states, HOAs have more latitude to regulate ground-mount aesthetics and placement.
The Hybrid Option: Rooftop Plus Ground Array
Some properties benefit from a split system — using the rooftop for a portion of the system and a ground array for the remainder. This works well when:
- The roof can accommodate 6–8 panels on a good south-facing surface, but you need 14–16 panels total for home + EV coverage
- Part of the roof faces south optimally while another section faces east — rooftop covers the south section, ground mount handles the rest
- You want to start with rooftop solar now and add a ground array in a few years as budget permits
A hybrid system can be wired together on a single inverter (if both arrays face the same direction) or use separate inverters (or separate MPPT inputs on a multi-channel inverter) if orientations differ. Discuss the wiring design with your installer before committing to a hybrid approach.
Our free solar calculator estimates production and savings for your specific address based on roof orientation, shading data, and local electricity rates. Use it as a starting point before getting quotes for either installation type.
Calculate My Solar Options →